Looking for a quick lunch or dinner that packs a protein punch? These falafel do the trick. They are low-histamine, anti-inflammatory, heart healthy, vegan and gluten free! These took 20 minutes from start to finish and use pantry staples. The crispy outside makes them feel indulgent but by using extra light olive oil we are providing healthy anti-inflammatory fats.
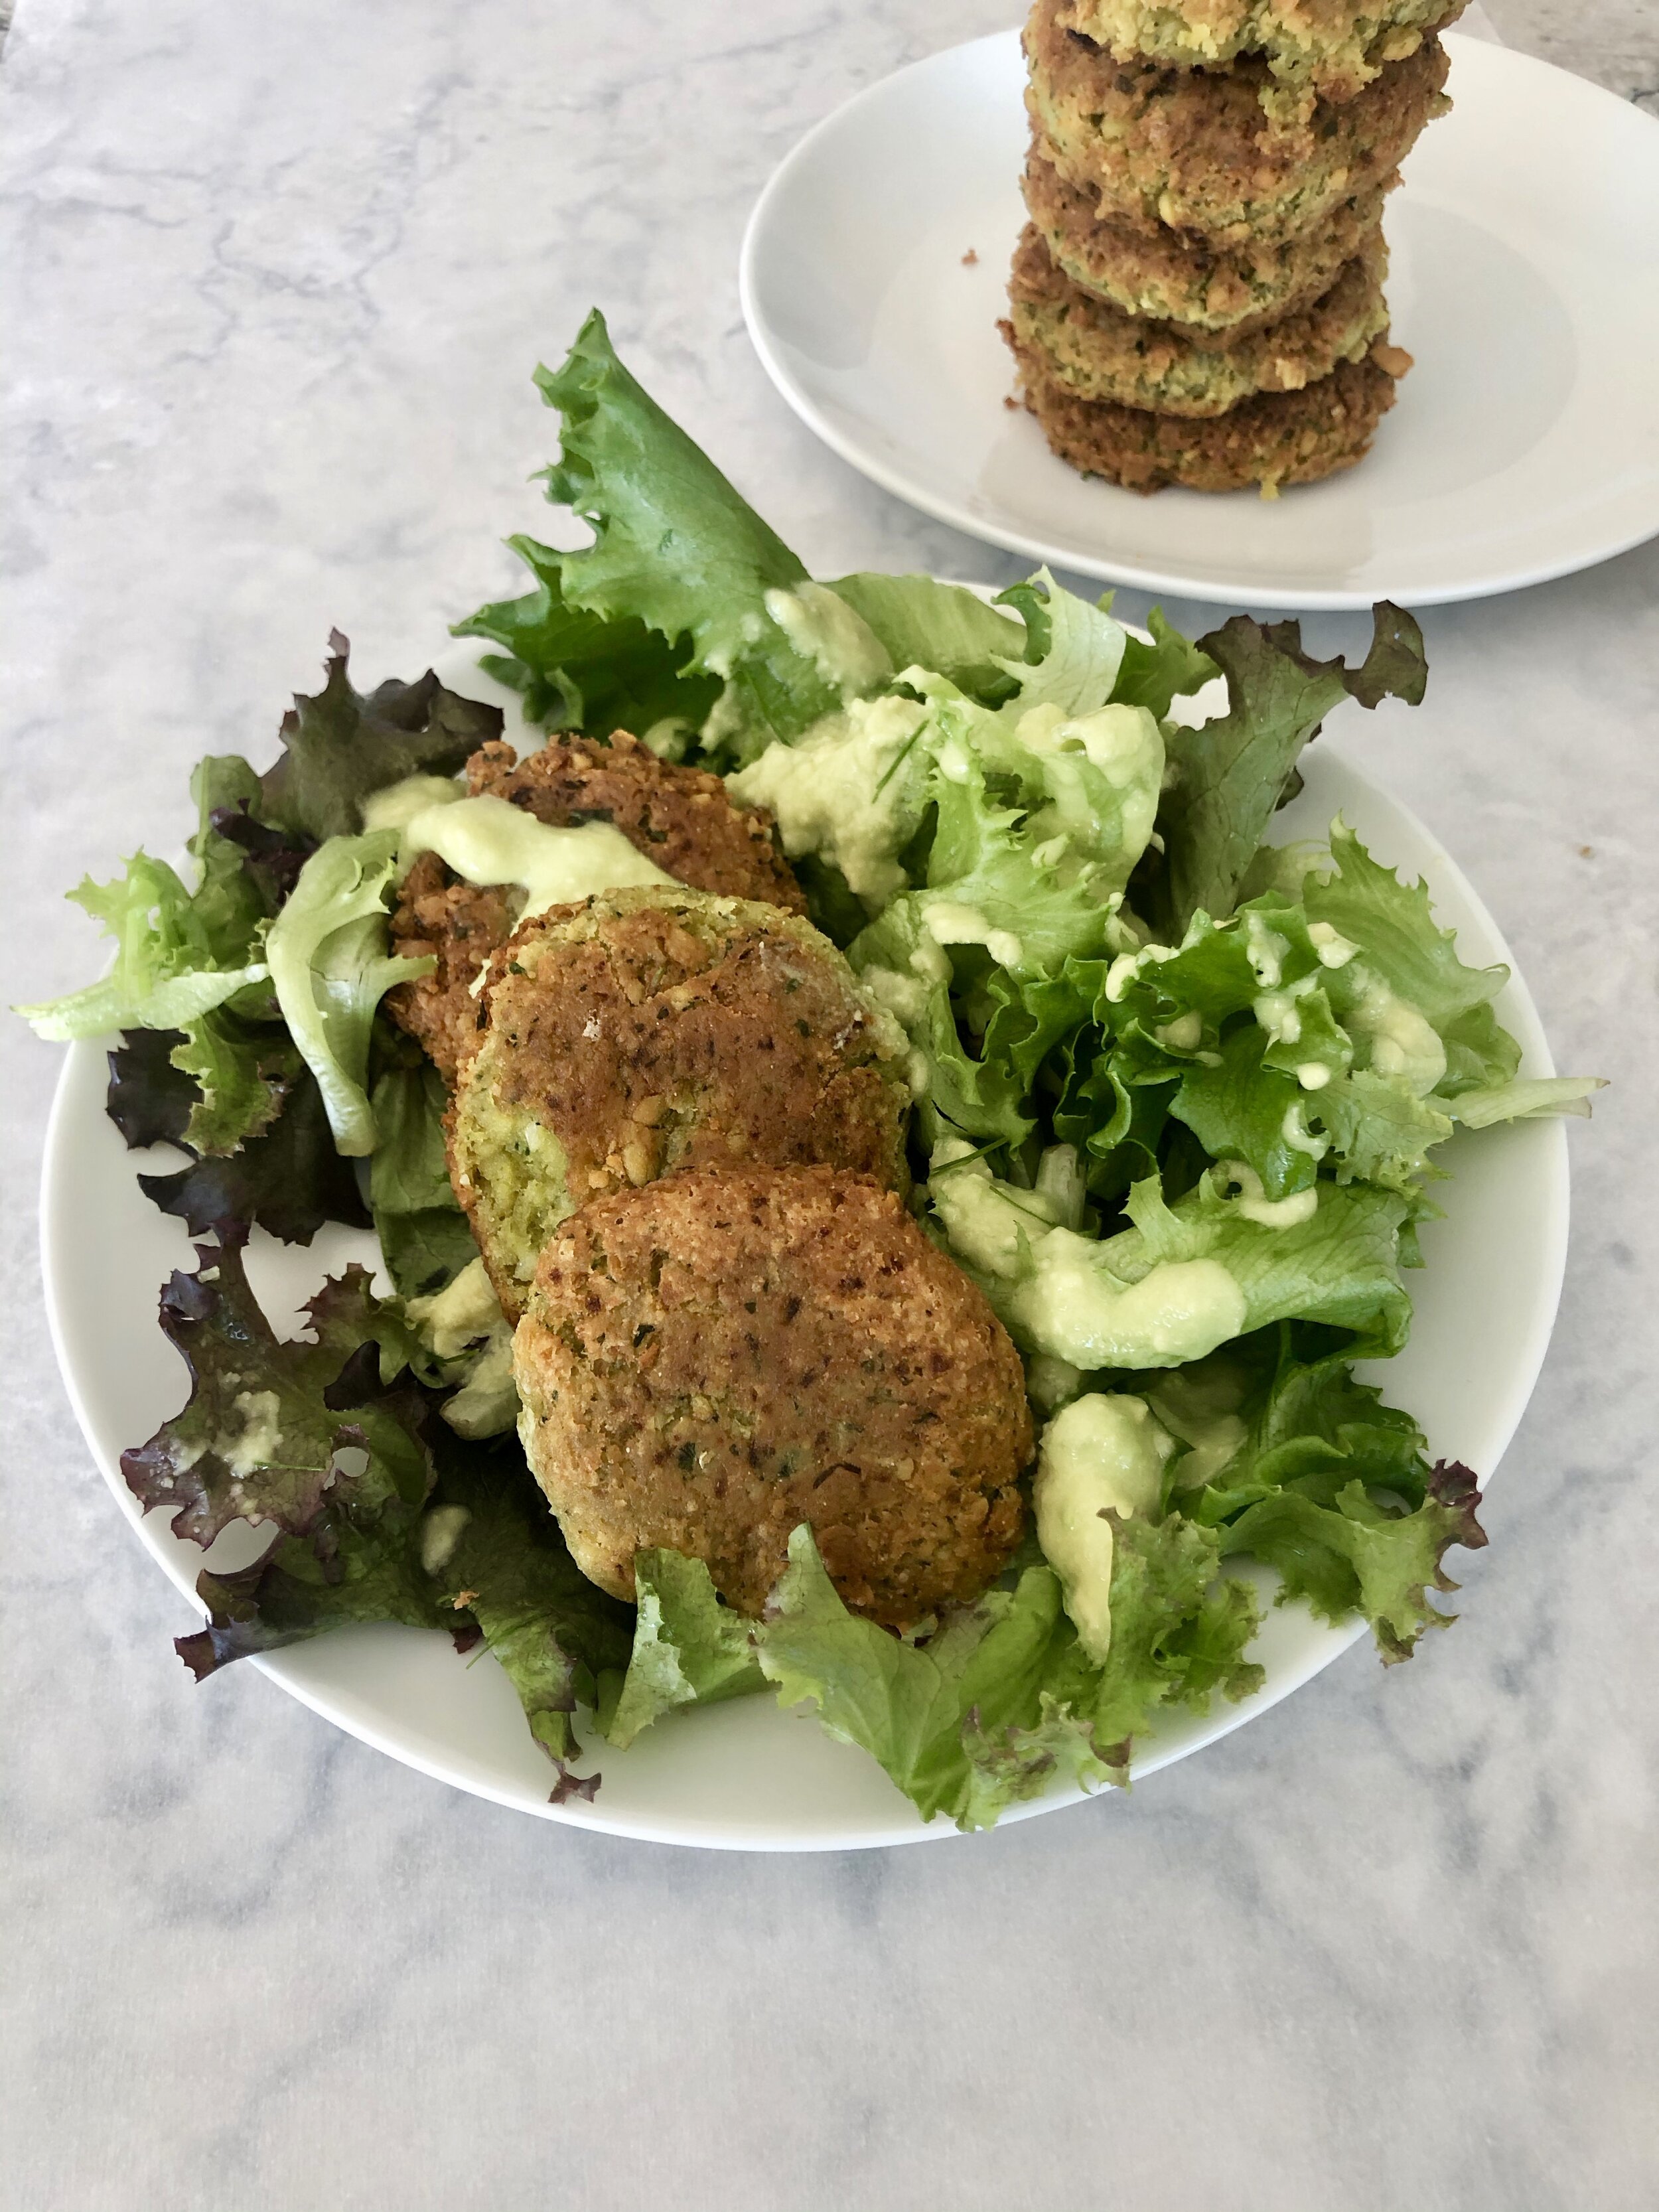
Falafel with Avocado Tzatziki Sauce
Makes: about 10 small falafel
Total Time: 20 minutes
Ingredients:
2 cups of chickpeas (canned or cooked from dry)
1/2 onion diced
1 clove of garlic
1/2 tsp cumin
1/2 tsp salt
2 Tbs extra virgin olive oil
1/4C gluten free all purpose flour
3 Tbs diced chives
1/2 C fresh spinach leaves or kale or parsley
For cooking:
1/4C extra light olive oil
Sauce:
1 avocado
2 Tbs diced cucumber
2 Tbs diced onion
2 Tbs chopped chives
3-4 Tbs water
1/4 tsp salt
Directions:
Add all ingredients above and pulse in a food processor until the dough is course and mostly broken down but not yet a paste. Make sure it can press into a ball or patty or add a little water to help it stick together.
In a large skillet add extra light olive oil and heat over medium heat for 3 minutes.
Add falafel patties or balls to the heated olive oil. Cook about 4 minutes on each side or until golden. When cooked, remove falafel and place on a plate covered by a paper towel to remove the rest of the oil.
To make sauce take 1 avocado and mash with a fork until smooth, add 3-4 Tbs of water to thin out. Add 1/4 tsp salt, 2 Tbs finely chopped cucumber and 2 Tbs finely chopped onion and 1 Tbs chopped chives. Mix together and thin out with more water if desired. Serve falafel with sauce and greens. Freeze up extra falafel to warm up for a quick meal.